Onboard an FDM-Managed Device Using Username, Password, and IP Address
Use this procedure to onboard an FDM-managed device using only the device credentials and the device's Management IP address. This is the simplest method of onboarding an FDM-managed device.
However, the recommended way of onboarding an FDM-managed device to Security Cloud Control is by using a registration key.
Before you begin
Important | Before you onboard an FDM-managed device to Security Cloud Control, read Onboarding an FDM-managed Device and Connect Security Cloud Control to your Managed Devices. They provide the general device requirements and onboarding prerequisites needed to onboard a device. |
-
You need the following information to onboard an FDM-managed device using the credentials method:
-
The device credentials Security Cloud Control will use to connect to the device.
-
The device's IP address of the interface you are using to manage the device. This may be the Management interface, an inside interface, or the outside interface depending on how you have configured your network.
-
The device must be managed by Secure Firewall Device Manager and configured for local management in order for you to onboard it to Security Cloud Control. It cannot be managed by Secure Firewall Management Center.
-
Note | If you connect to https://eu.manage.security.cisco.com and your FDM-managed device is running software version 6.4, you must use this method. You can only onboard an FDM-managed device running software version 6.5+. |
Procedure
Step 1 | Log in to Security Cloud Control. | ||
Step 2 | In the left pane, click . | ||
Step 3 | Click the blue plus button | ||
Step 4 | Click FTD.
| ||
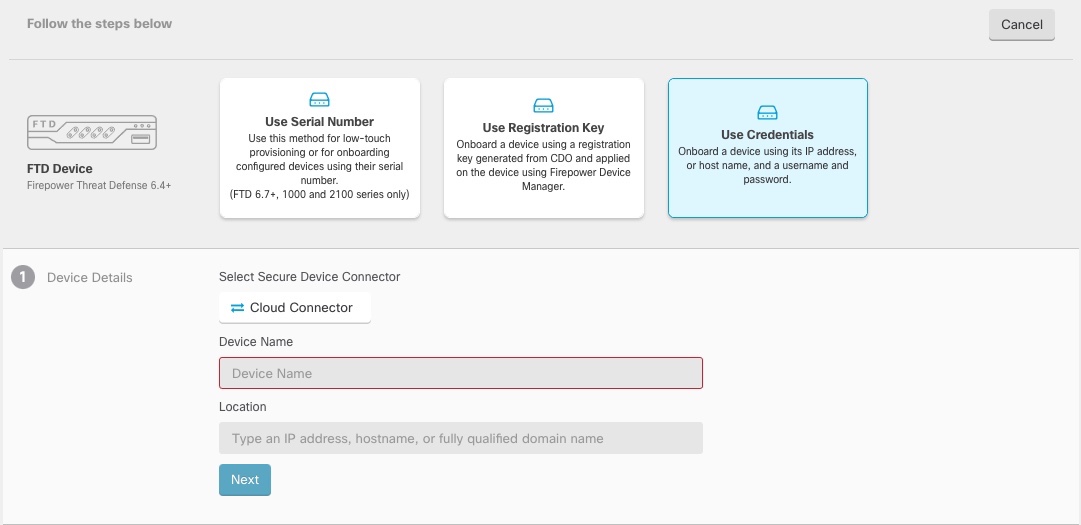
Step 5 | In the onboarding wizard, click Use Credentials. | ||
Step 6 | In the Device Details step:
| ||
Step 7 | In the Database Updates area, the Immediately perform security updates, and enable recurring updates is enabled by default. This option immediately triggers a security update as well as automatically schedules the device to check for additional updates every Monday at 2AM. See Update FTD Security Databases and Schedule a Security Database Update for more information. Disabling this option does not affect any previously scheduled updates you may have configured through FDM. Click Next. | ||
Step 8 | Enter the device administrator's username and password and click Next. | ||
Step 9 | If there are pending changes on the device's Secure Firewall Device Manager, you will be notified and you can revert the changes or log in to the manager and deploy the pending changes. If there are no pending changes on Secure Firewall Device Manager, you will not see a prompt. | ||
Step 10 | (Optional) Add a label the device. See Labels and Label Groups for more information. |
 to Onboard a device.