Deploy Configuration Changes
After you change configurations, deploy them to the affected devices. We strongly recommend that you deploy in a maintenance window or at a time when any interruptions to traffic flow and inspection will have the least impact.
Caution | When you deploy, resource demands may result in a small number of packets dropping without inspection. Additionally, deploying some configurations restarts the Snort process, which interrupts traffic inspection. Whether traffic drops during this interruption or passes without further inspection depends on how the target device handles traffic. See Snort Restart Traffic Behavior and Configurations that Restart the Snort Process When Deployed or Activated.
|
Before you begin
-
Be sure all managed devices use the same revision of the Security Zones object. If you have edited security zone objects: Do not deploy configuration changes to any device until you edit the zone setting for interfaces on all devices you want to sync. You must deploy to all managed devices at the same time.
-
To preview the deployment changes, enable REST API access. To enable the REST API access, follow the steps in Enabling REST API Access.
Note | The deployment process fails if the device configuration is being read at the device CLI during deployment. Do not execute commands such as show running-config during the deployment. |
Procedure
Step 1 | On the Firewall Management Center menu bar, click Deploy. | ||
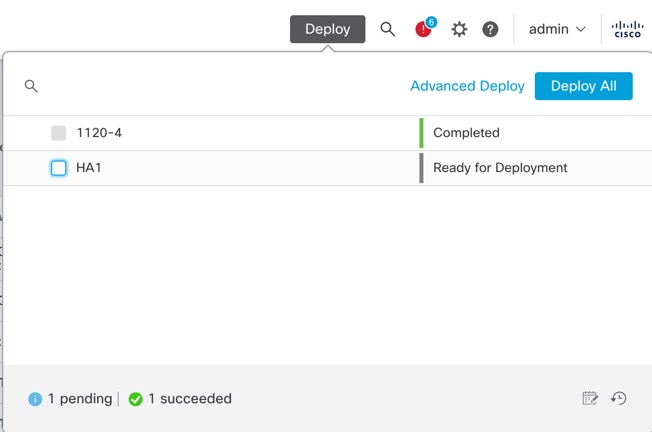
Step 2 | For a quick deployment, check specific devices and then click Deploy, or click Deploy All to deploy to all devices. Otherwise, for additional deployment options, click Advanced Deploy. The rest of this procedure applies to the Advanced Deploy screen. 

| ||
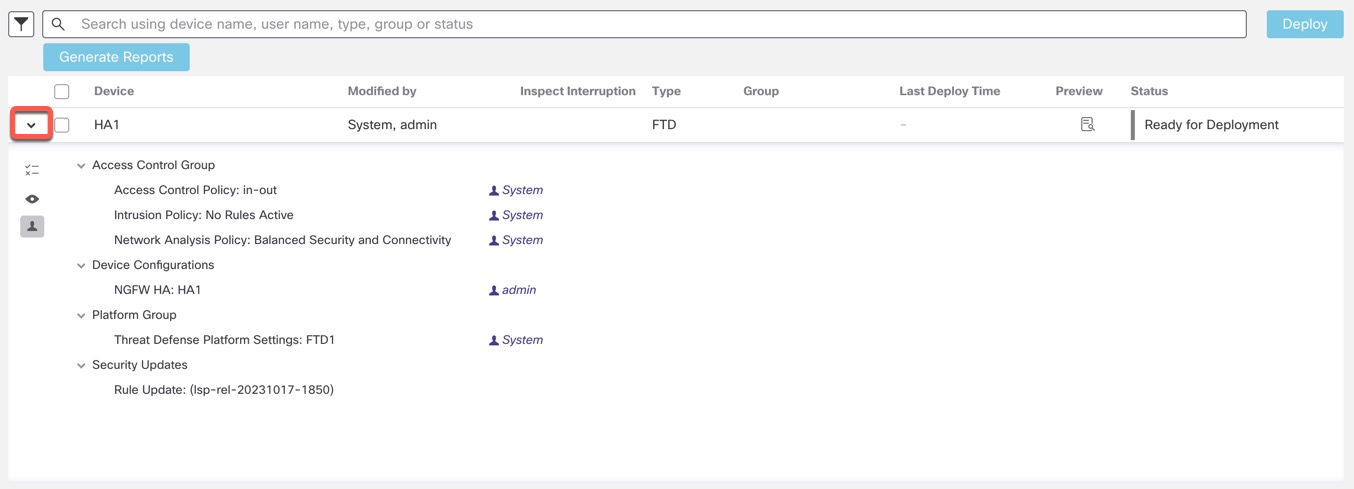
Step 3 | Click Expand Arrow ( 
| ||
Step 4 | In the Preview column, click Preview ( 
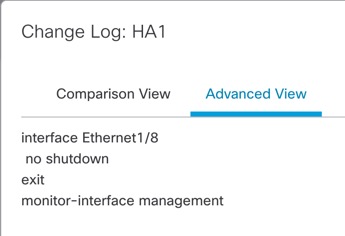
For unsupported features for Preview, see Deployment Preview. The Comparison View tab lists all the policy and object changes. The left pane lists all the different policy types that have changed on the device, organized in a tree structure. 
The Filter( The right pane lists all the additions, changes, or deletions in the policy, or the object selected in the left pane. The two columns on the right pane provide the last deployed configuration settings (in the Deployed Version column) versus the changes that are due for deployment (in the Version on Firewall Management Center column). The last-deployed configuration settings are derived from a snapshot of the last saved deployment in the Firewall Management Center and not from the device. The background colors of the settings are color-coded as per the legend available on the top-right of the page. The Modified By column lists the users who have modified, or added the configuration settings. At the policy level, the Firewall Management Center displays all the users who have modified the policy, and at the rule level, the Firewall Management Center displays only the last user who has modified the rule. You can download a copy of the change log by clicking the Download Report button. The Advanced View tab shows the CLI commands that will be applied. This view is useful if you are familiar with ASA CLI, which is used on the back end of the Firewall Threat Defense. 
| ||
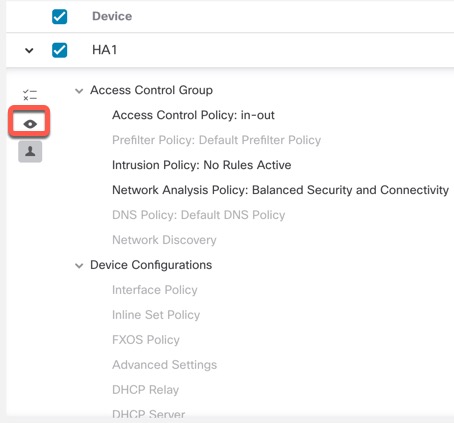
Step 5 | Use Show or Hide Policy ( 
| ||
Step 6 | Check the box next to the device name to deploy all configuration changes, or click Policy selection (
You can also view the interdependent changes for a certain policy or configuration using this option. The Firewall Management Center dynamically detects dependencies between policies (for example, between an access control policy and an intrusion policy), and between the shared objects and the policies. Interdependent changes are indicated using color-coded tags to identify a set of interdependent deployment changes. When one of the deployment changes is selected, the interdependent changes are automatically selected. For more details, see Selective Policy Deployment.
| ||
Step 7 | After you select the devices or policies to deploy, click Estimate to get a rough estimate of the deployment duration. 

The time duration is a rough estimate (having around 70% accuracy), and the actual time taken for deployment may vary for a few scenarios. The estimate is dependable for deployments of up to 20 devices. When an estimate is not available, it indicates that the data is not available, since the first successful deployment on the selected device is pending. This situation could occur after the Firewall Management Center reimage, version upgrade, or after a high availability failover.
| ||
Step 8 | Click Deploy. | ||
Step 9 | If the system identifies errors or warnings in the changes to be deployed, it displays them in the Validation Messages window. To view complete details, click the arrow icon before the warnings or errors. You have the following choices:
|
What to do next
-
(Optional) Monitor deployment status; see View Deployment Messages.
-
If the deployment fails, see Best Practices for Deploying Configuration Changes.
-
During deployment, if there are specific configuration changes in the deployment, the deployment failure may lead to traffic being interrupted. For example, in a cluster environment, an erroneous configuration of an IP address that is not in the same subnet as the Site IPs is configured on the interface. Due to this error, deployment fails and the device attempts to clear the configuration while the rollback operation is being processed. These events collectively lead to a deployment failure that interrupts the traffic.
See the following table to know what configuration changes may cause traffic interruption when deployment fails.
Configuration Changes
Exists?
Traffic Impacted?
Threat Defense Service changes in an access control policy
Yes
Yes
VRF
Yes
Yes
Interface
Yes
Yes
QoS
Yes
Yes
NoteThe configuration changes interrupting traffic during deployment is valid only if both the Firewall Management Center and the Firewall Threat Defense are of version 6.2.3 or higher.


