Create an Azure user with minimal permissions for the dynamic attributes connector
Create an Azure service account with minimal permissions to send dynamic attributes to Security Cloud Control.
This task discusses how to set up a service account with minimum permissions to send dynamic attributes to Security Cloud Control. For a list of these attributes, see Azure connector—About user permissions and imported data.
Before you begin
You must already have a Microsoft Azure account. To set one up, see this page on the Azure documentation site.
Follow these steps to create an Azure user with minimal permissions for the dynamic attributes connector:
Procedure
Step 1 | Log in to the Azure Portal as the owner of the subscription. |
Step 2 | Click Azure Active Directory. Find the instance of Azure Active Directory for the application you want to set up. |
Step 3 | Click .
|
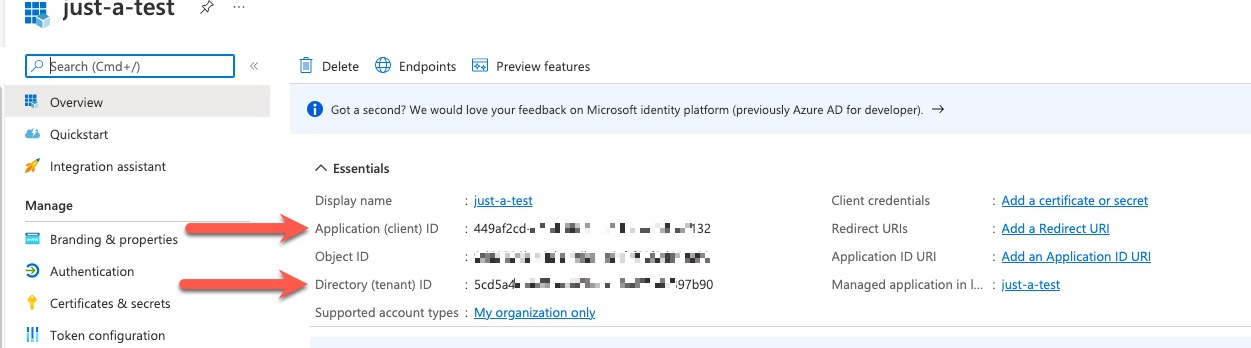
Step 4 | On the next page, write down or copy the Client ID (also referred to as application ID) and the tenant ID (also referred to as the directory ID). Here is a sample:
|
Step 5 | Next to Client Credentials, click Add a certificate or secret. |
Step 6 | Click New Client Secret.
|
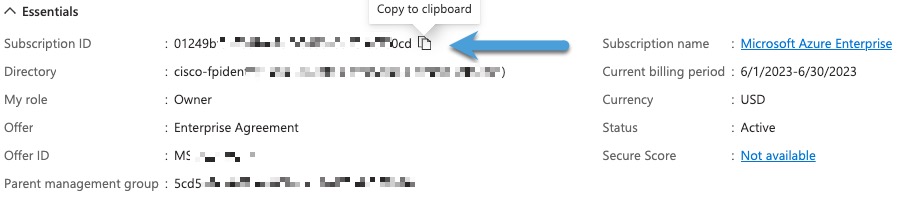
Step 7 | Go back to the main Azure Portal page and click Subscriptions.
|
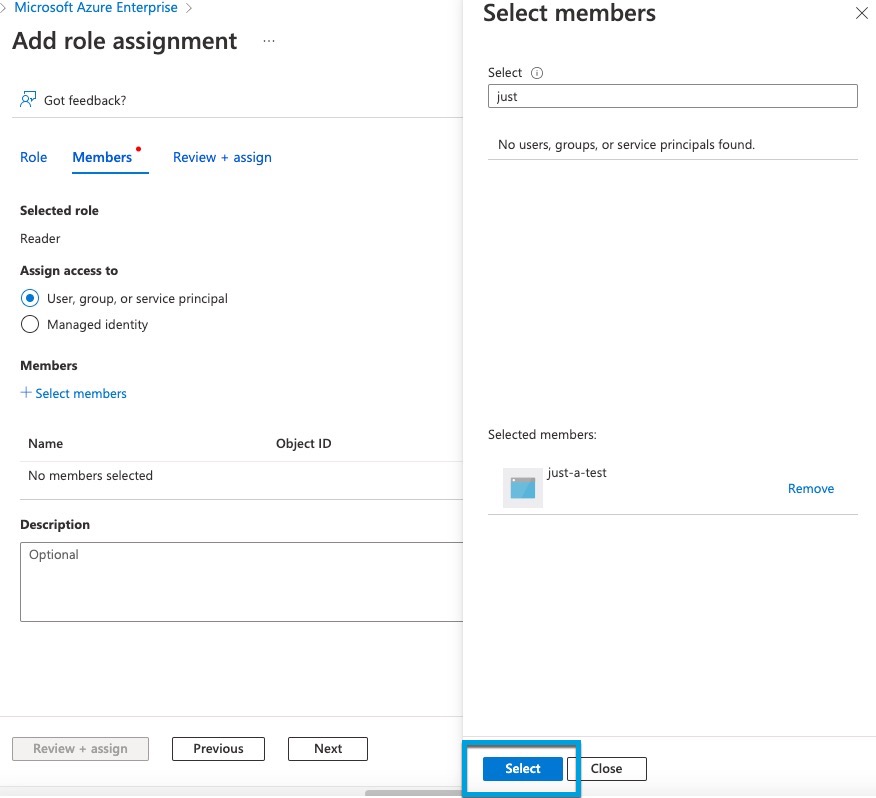
Step 8 | Click Access Control (IAM).
|