Create a proxy sequence
A proxy sequence is one or more managed devices that can be used to communicate with an LDAP, Active Directory, or ISE/ISE-PIC server. It is necessary only if cannot communicate with your Active Directory or ISE/ISE-PIC server. (For example, might be in a public cloud but Active Directory or ISE/ISE-PIC might be in a private cloud.)
Although you can use one managed device as a proxy sequence, we strongly recommend you set up two or more so that, in the event one managed device cannot communicate with Active Directory or ISE/ISE-PIC, another managed device can take over.
Before you begin
You must add at least two managed devices to Security Cloud Control, all of which must be able to communicate with Active Directory or ISE/ISE-PIC.
Procedure
Step 1 | Log in to the if you have not already done so. |
Step 2 | Click . |
Step 3 | Click Add Proxy Sequence. |
Step 4 | In the Name field, enter a name to identify the proxy sequence. |
Step 5 | (Optional.) In the Description field, enter a description for the proxy sequence. |
Step 6 | Under Proxies, click Add ( |
Step 7 | Click the name of each managed device to add to the sequence. To narrow your search, enter all or part of a realm name in Filter field. |
Step 8 | Click OK. |
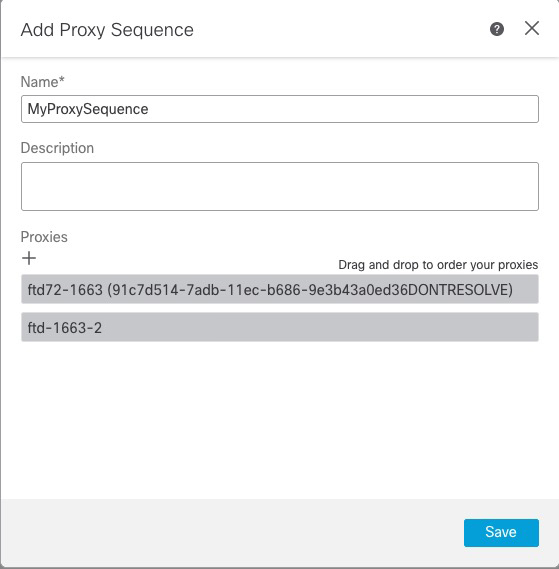
Step 9 | In the Add Proxy Sequence dialog box, drag and drop the proxies in the order in which you want Security Cloud Control to search for them. The following figure shows an example of a proxy sequence consisting of two proxies. The top proxy will be searched for users before the bottom proxy. Both proxies must be able to communicate with either Active Directory or ISE/ISE-PIC.
|
Step 10 | Click Save. |

